Best Practices: 3 Tips for Resolving “Element Not Found” Errors When Extracting Data
May 03, 2016
Websites change.
This one fact makes extracting data from the web unpredictable, but that doesn’t mean you should give up when your agent stops working. Setting up your agent to account for updated or missing data can be done easily once you have a fundamental understanding of why these errors occur and how to handle them.
1. Mark as Optional or Reassign the Location
“Element Not Found” comes up frequently in the Agent Builder, and it’s important to note that this refers to an HTML element. In other words, the agent has been told explicitly to find an object that is missing from the page, so it needs further instructions to proceed.
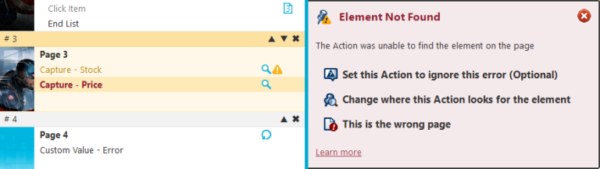
Several options are presented in the Agent Builder to resolve this problem when it is encountered. Let’s look at them one by one:
- Set this action to ignore this error (Optional). This is very useful when an element only occurs on some pages. Marking the action as optional will skip over instances where the target element is absent.
- Change where this action looks for the element. If the location of the element has changed, you can select this option and either reassign its path or add an alternate location.
- This is the wrong page. If the action has been added or moved to the wrong page, this will allow you to switch it to an existing or new page easily.
These basic tools make up the first line of defense against broken agents and lost data.
2. Get Details by Creating a Dedicated Error Handling Page
The main drawback to marking an item as optional is that it provides no explanation for why your fields are blank. You can fine-tune the feedback provided by the agent by creating an error handling page that will tell you what happened to the expected results.
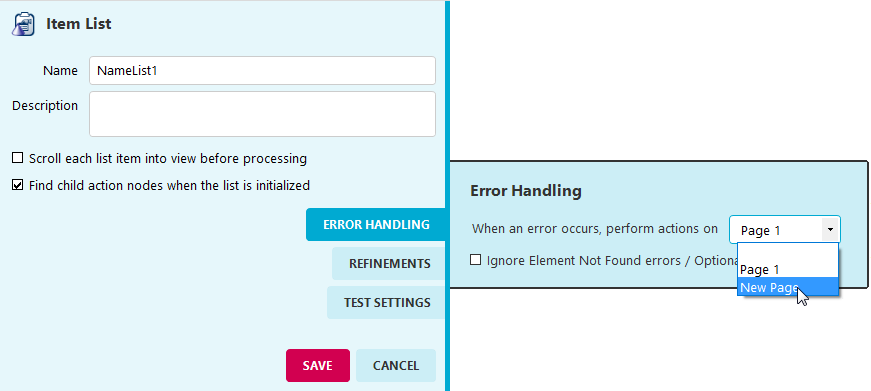
Create a new page for error handling by viewing the action’s properties and selecting the Error Handling option. Click the dropdown, click New Page, then click Save.
You can use this new page to handle an error by creating a custom value that reports a specific error based on the action. For example, if you are attempting to gather a list of products but expect that some categories will be empty, you can create a custom value that returns a specific cause for the missing data.
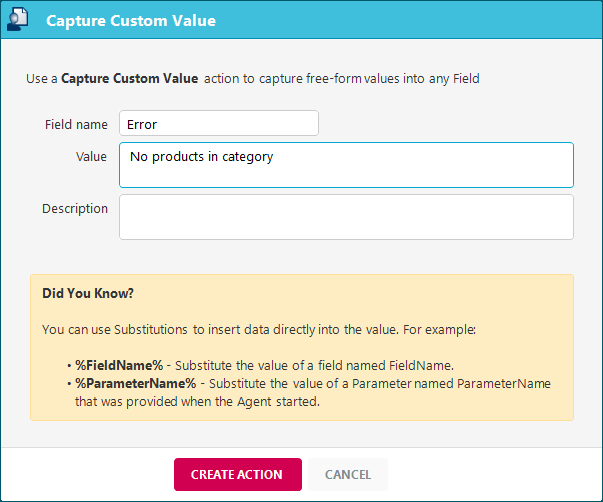
In this example, the custom value will return “No products in this category” in the “Error” column when the list isn’t found, indicating that there are no products in the specified category.
This method takes more time than simply marking it as optional, but will give you a much better idea of why data is missing from the results.
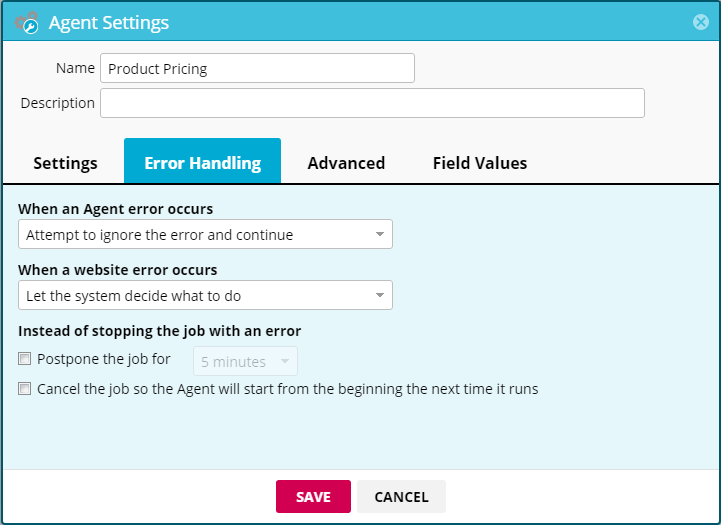
3. Check Your Agent Settings
Once you have everything configured in the Agent Builder, check your agent settings in the Web Console to ensure that it handles errors the way you want them to. You can choose to halt the agent whenever a website or agent error occurs if you want to work out all the kinks, or you can allow it to ignore errors if some data loss is acceptable.
Conclusion
Using proper error handling methods ensures that you are collecting the most accurate data possible and that you stay in control of what happens when something unexpected occurs.
Have questions about error handling? Contact Mozenda support at support@mozenda.com or by calling +1.801.995.4550, option 2.