Web Scraping Tips – Capture Table Action
April 21, 2015
In our latest release, we added the Capture Table action, which makes capturing data from tables easier and more accurate than ever, especially when capturing data from dynamic tables or tables with complicated layouts.
In this walk through, we’ll introduce you to this new action and share with you a few of the benefits achieved by using it.
Overcoming the challenges of capturing data from tables
In the past, capturing data from tables has often required more time and custom configuration than capturing other types of data. In addition, capturing data from tables can be challenging because of the different table configurations found on the internet. Columns frequently change their position within the table or appear only under certain circumstances. Sometimes, adjacent cells within the table are merged across multiple columns. Other table layouts include multiple header rows. The list of variations is long, and this inconsistency has always been a challenge for Agent Builders as they try and accurately capture the content in tables.
The Capture Table action responds to these challenges with a new time-saving table capturing process that improves precision and accuracy, and adjusts dynamically to accommodate changes in the table layout. This is all done automatically without having to manually maintain the Capture actions capturing the table’s data.
Automatic association with nearby text
Capture actions within a Capture Table action are automatically associated to a column or row by its header name rather than its position in the table. This means that when a table header changes position, its data will still be recognized and captured into the correct field.
Capture tables with multiple header rows
Some tables have two or more rows of headers, where a row of sub-headers exists beneath a row of general headers. The Capture Table action recognizes which sub-headers are associated with each general header and automatically assigns appropriate field names to the columns.
Intuitively collect image URLs
Many tables include columns that are populated with images rather than text data. These are recognized by the Capture Table action and the associated Capture actions adjust to capture the image URL.
Dynamic Field Recognition
This is a big time-saver. Some tables have columns that do not always appear. Tables showing product specifications, for example, may show certain columns only on the product pages where they are applicable, resulting in a constantly changing set of columns.
In the past, you either needed to identify all possible table columns in advance and add Capture actions for them manually, or limit your Agent to capturing just those columns that always appear in the table.
The Capture Table action solves this problem by recognizing new columns and automatically creating new Capture actions while the Agent is running.
When to use the Capture Table action
The Capture Table action most effectively captures data laid out in a grid where there is a label or header associated with each column or row. The slideshow above shows some examples of data organized into tables on a different webpages. You’ll notice that sometimes the table headers are on the left and sometimes on the right. Sometimes there will be stacked header rows or multiple columns under a single table header. The Capture Table action is versatile enough to handle all of these scenarios.
How to use the Capture Table action
Below, we will show you the steps to create a Capture Table action. We recommend following along by using the Agent Builder to capture data from a table that interests you.
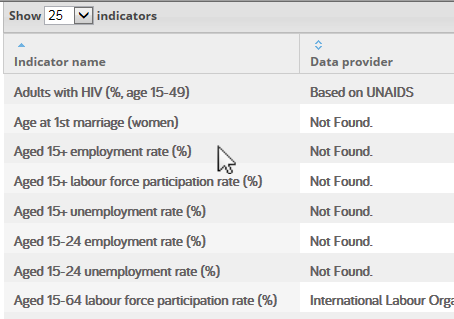
1. To get started creating a Capture Table action, click on any text in a table:
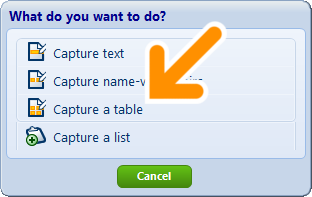
2. When the What do you want to do? window appears, choose Capture a table:
Notice that instructions for creating the Capture Table action appear in the upper-left panel of the Agent Builder:
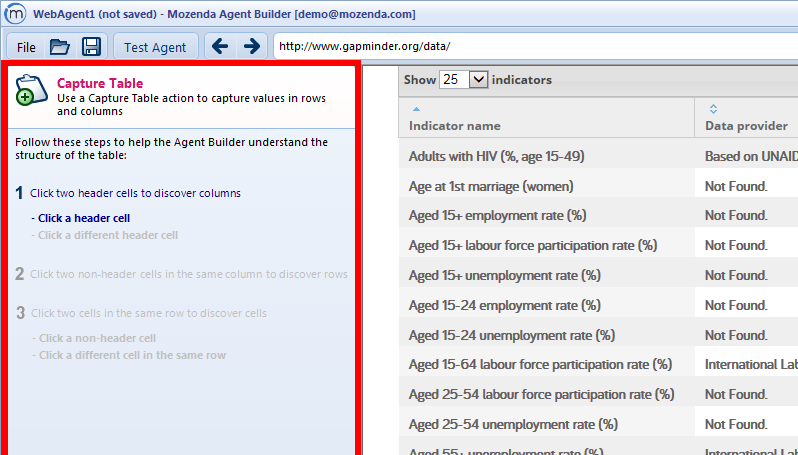
3. Click two distinct header cells, one after the other. This will help the Agent Builder identify all of the headers in the table.
After clicking two distinct header cells, the Agent Builder will automatically identify all of the headers in the table and will show you a list of the text contained within each header cell:
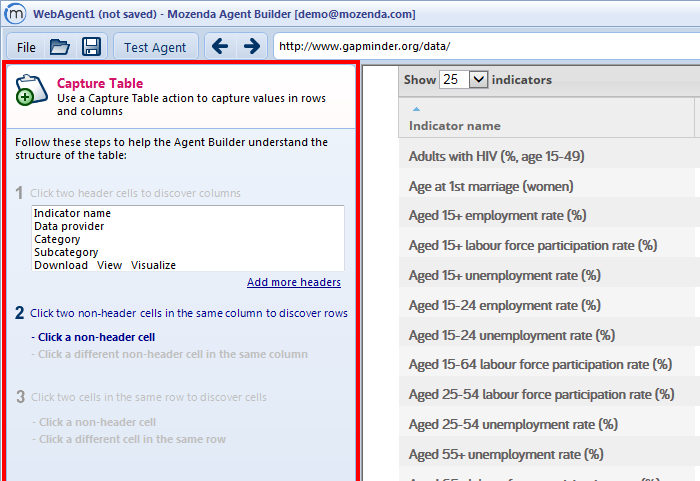
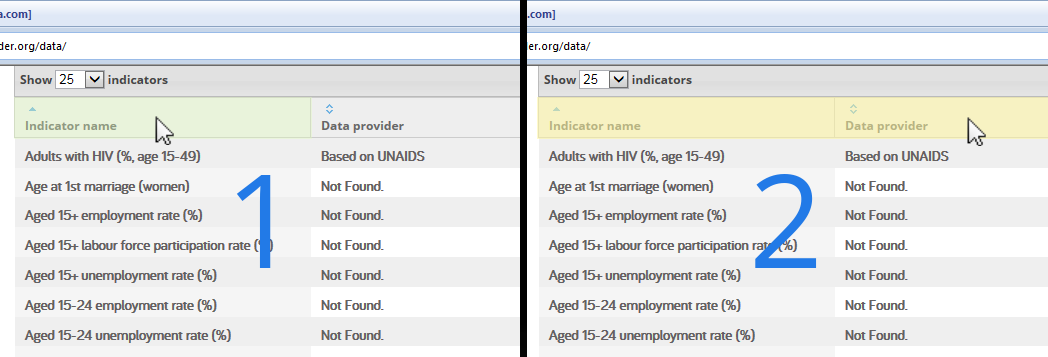
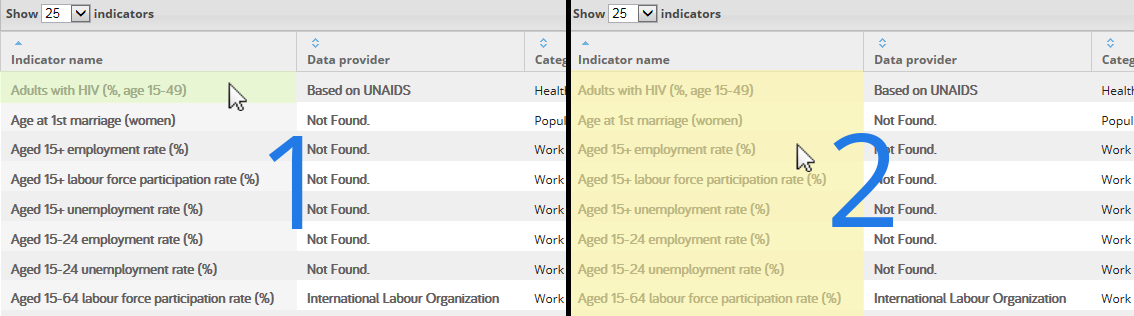
4. Next, click two non-header cells in the same column, one after another. It isn’t important which column contains the two non-header cells you click, just that the two cells you click are not headers and are in the same column. This helps Mozenda identify the table’s rows.
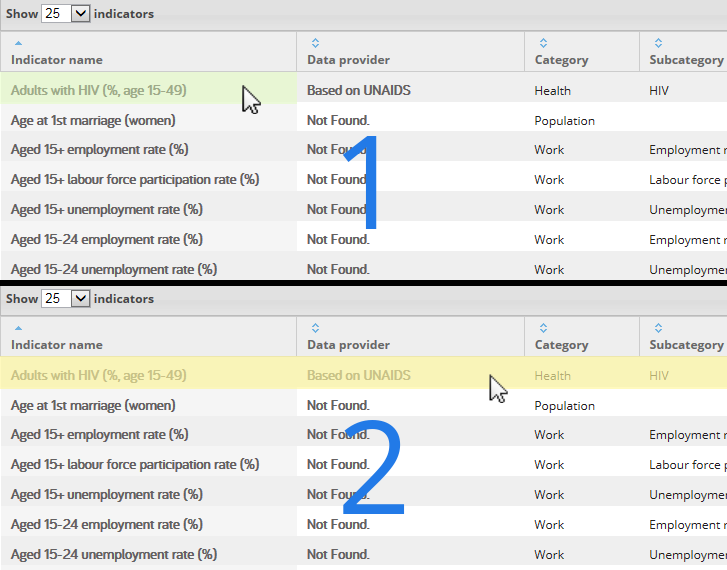
5. Next, click two distinct cells from the same non-header row, one after another. Just like the previous step where you clicked two non-header cells in the same column, click any two non-header cells from any row. This helps Mozenda determine the location of the cells within each row.
The Agent Builder now has the information it needs to discover all of the columns, rows, and cells of the table. The Agent Builder will show you a preview of the data it finds:
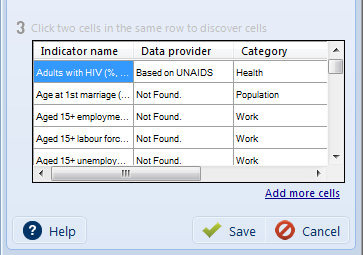
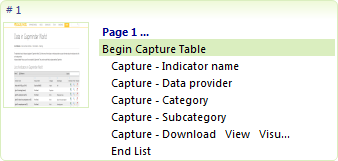
6. Finally, click the Save button. The Capture Table action will appear with its Capture actions on the page.
Related Help Topics
This walk-through showed you how to create a Capture Table action to capture data from a very basic table. However, tables can be laid out in many different formats. Horizontal tables with headers in the left column, vertical tables with multiple header rows, and tables with merged data cells are just a few of the types of table layouts you may encounter. We encourage you to take a look at these additional help topics to learn more about capturing data from some of these more complicated table layouts:
Capture a table with headers in the left column
Capture a table with multiple header rows
Capture a table with merged cells